A combined wardrobe and study table saves floor area only when the chair, doors, light and wiring receive as much attention as the cabinets. By measuring the wall and comparing the main layouts, you can choose a unit that stores clothes and study materials without turning the desk into a cramped storage ledge.
Key takeaways
- Allow 1.35–1.50 m depth for a 600 mm desk and occupied chair.
- Keep 750 mm walking clearance behind the chair where passage is required.
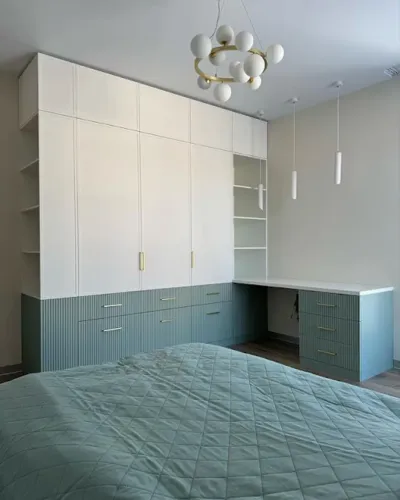
- Compare straight, L-shaped, corner, fold-down and recessed desk layouts.
- Specify cable routes, socket positions, shelf heights and door clearances before fabrication.
Measure the Wall and the Clearances Before Choosing a Layout
A wardrobe-study unit with a 600 mm-deep desk needs about 1.35–1.50 m of room depth when occupied: 600 mm for the desk and 750–900 mm for chair clearance. Keep a further 750 mm walking passage where people must pass behind the chair.
Measure the usable wall, not the plaster-to-plaster distance. Record:
- Wall width between door frames, windows and adjoining walls
- Ceiling height, skirting-board depth and any uneven corners
- Window opening, curtain reach, switches and plug-point positions
- Floor depth from the wall to the bed, door swing and opposite furniture
These compact bedroom measurements determine whether the desk can remain open without blocking movement or daylight. A 450–600 mm desk depth suits writing and a laptop; choose 600 mm for a monitor, keyboard and notebook. Do not recover wall space by cutting knee room or forcing the chair against a cabinet.
| Configuration | Approximate wall space | Floor and access requirement |
|---|---|---|
| Fold-down desk in wardrobe | Wardrobe width only, commonly 1,200–1,800 mm | Desk projects when open; preserve 750–900 mm chair clearance |
| Side-mounted desk | Wardrobe width plus desk width, often 1,800–2,400 mm | Requires the full desk depth and chair zone |
| Desk between wardrobe towers | About 1,800–2,400 mm | Check drawer, door and chair openings together |
| Pull-out desk | Wardrobe width, with a 450–600 mm work surface | Keep the pull-out path clear |
| Separate table beside wardrobe | Wardrobe width plus table width | Offers easier chair movement but uses more wall |
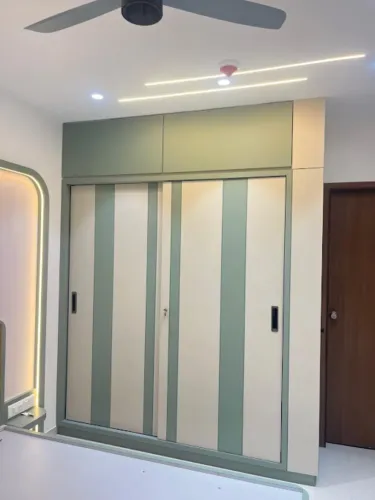
Sliding doors save swing space, not opening access: one panel still covers part of the wardrobe. Anchor tall units to the wall, and test every door and drawer fully open before ordering.
Compare Five Wardrobe-and-Desk Configurations
For the most efficient use of one wall, choose a full-height wardrobe with a fold-down study table when the desk is used intermittently. It preserves a practical desktop while returning floor space when closed; the best choice changes if you work for hours each day.
| Configuration | Wall and floor use | Main advantage | Watch before choosing |
|---|---|---|---|
| Full-height wardrobe with fold-down study table | Uses the wardrobe’s full height; leaves no permanent desk projection | Best floor-saving option for occasional study | Hinges, brackets and fixings must support the desktop, monitor, books and leaning load; fix into a stud, masonry or a designed load-bearing panel |
| Side-mounted desk | Adds a desk at one wardrobe end; uses more wall width | Keeps the surface permanently ready and avoids a central wardrobe interruption | Check that the side panel does not block a window, switch or passage |
| Pull-out desk | Hides the worktop inside a cabinet; uses minimal visible depth | Works for a laptop and short study sessions | A shallow surface can become uncomfortable, and its runners must carry the working load |
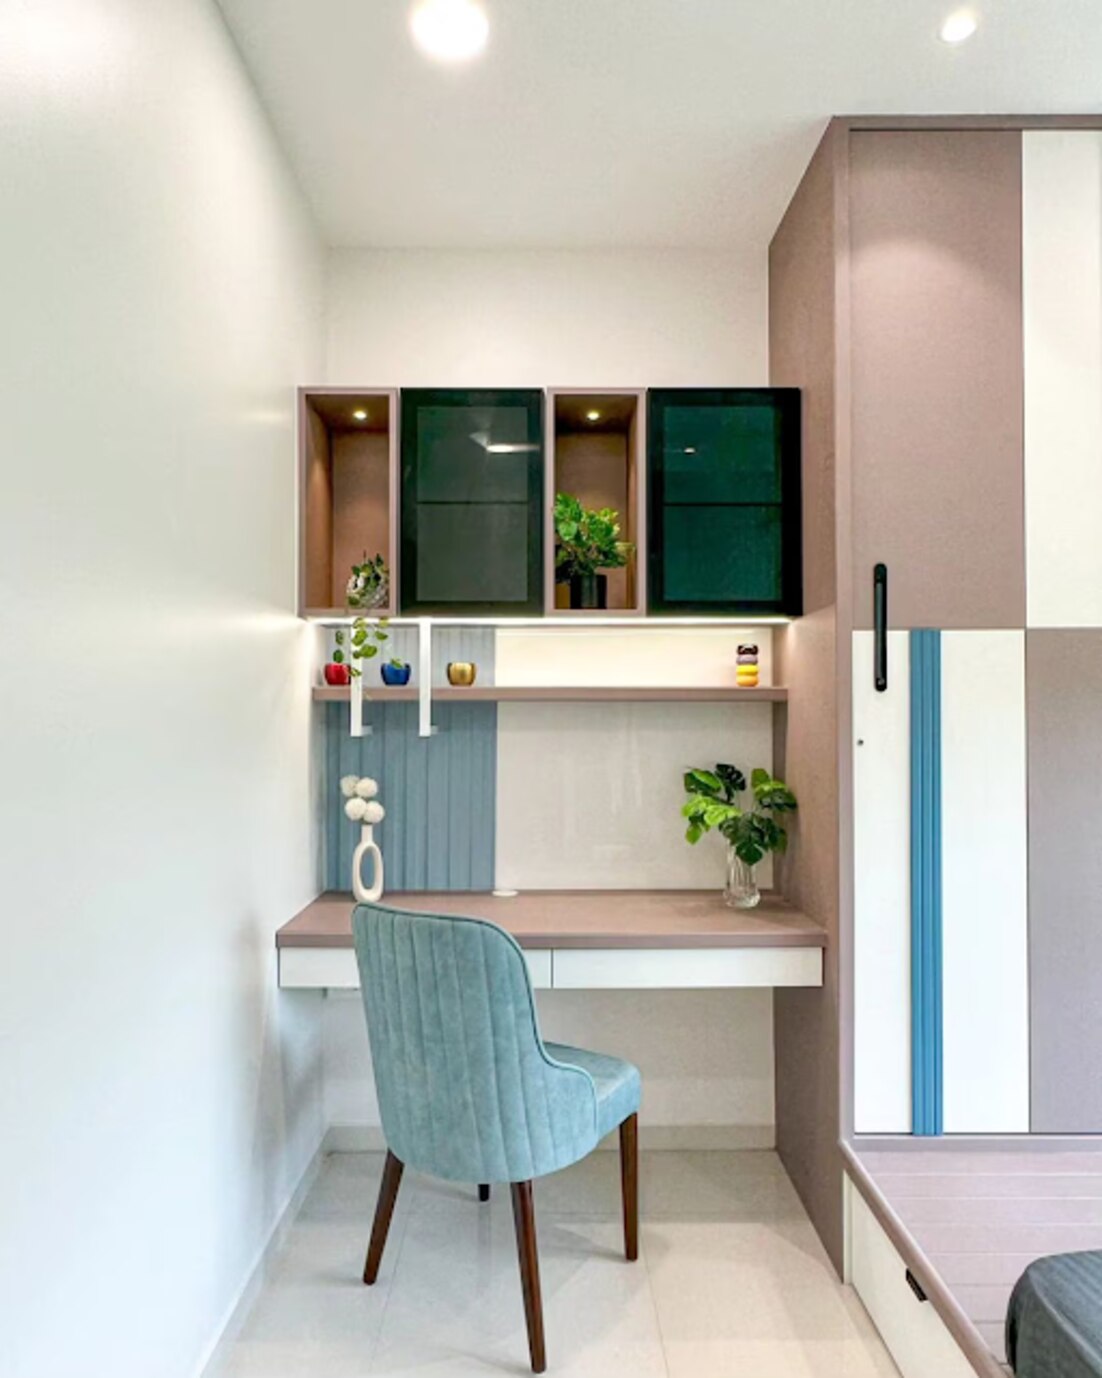
| Desk between wardrobe towers | Fills the wall with one continuous composition | Gives a fixed desk and substantial storage | Open every door, drawer and hamper fully; corner pockets can become unusable |
| Separate table beside the wardrobe | Uses the most wall and floor area | Offers the easiest chair access and future flexibility | It sacrifices the integrated unit’s vertical structure |
A 600 mm-deep desk still needs roughly 750–900 mm behind the chair, so occupied depth reaches about 1.35–1.50 m. For prolonged computer work, prioritise usable desk depth, a protected cable route and dedicated glare-controlled lighting over extra cabinet width.
Keep the Desk Comfortable When the Wardrobe Is Closed or Open
Leave the chair zone empty before you finalise an ergonomic study table. Provide 750–900 mm of clear space behind the seated user so the chair can pull out and someone can pass; a 600 mm-deep desk therefore needs roughly 1.35–1.50 m of front-to-back room depth when occupied.
Check the desk itself for knee clearance, not just its overall width. Keep the area beneath the worktop free of drawers or cabinet sides where your knees and feet move, and use a recessed desktop, open side panel or narrower desk section if tall wardrobe units flank it.
A full-depth cabinet directly beneath the surface can trap your elbows.
Door choice changes the chair conflict:
| Sliding wardrobe doors | Save the door-swing area in front of the unit, but one panel covers part of the opening when the other is open. | Use them beside a desk or chair where floor space is tight. |
|---|---|---|
| Wardrobe hinged doors | Expose more of the interior at once, but need a full swing zone that can hit the chair or desk. | Use them only after checking the door’s open position against the occupied chair zone. |
Keep the desktop away from a window’s opening path and do not let tall wardrobe towers block the main daylight. Add an adjustable task light under a shelf or on the wall, then route its cable to a nearby power point without crossing knee space or getting pinched by a fold-down mechanism.
Open every door, drawer and pull-out hamper in the design and sit in the chair at the same time. This reveals blocked handles and unusable corner pockets that an elevation drawing hides.
Assign Storage and Wiring So the Desk Does Not Become Cluttered
Assign each category a fixed zone before adding shelves or drawers. Good wardrobe storage organisation keeps clothing, books, school bags, electronics and cables from competing for the same surface.
- Store folded clothes in reachable shelves and hanging clothes in the taller section; reserve the lowest compartment for shoes or rarely used items.
- Keep books on adjustable shelves beside or above the desk, with books and school bag storage separated so the bag does not spill into the chair zone.
- Put a drawer or ventilated cubby near the desktop for a laptop, headphones, calculator and stationery. Leave the monitor, keyboard and mouse on the work surface.
- Route charging cables through a grommet or purpose-built channel at the rear of the desk, not over the front edge or across your knees.
Place the study table power socket above or beside the desktop, where you can reach it without moving the unit. Connect it to a cable route that reaches the nearest fixed outlet without crossing leg space or being pinched by a fold-down desk. Keep the power strip and chargers accessible for inspection and replacement.
Anchor the tall wardrobe to the wall; joining it to a desk does not prevent tip-over. Check that shelves and drawers open without striking the chair, and leave the monitor far enough from the back panel for comfortable viewing.
Turn the Measurements Into a Safe, Buildable Specification
Your final brief must state dimensions, clearances, materials, fixing points and load limits—not just “a wardrobe with a desk.” Give the fabricator a scaled wall sketch showing skirting, sockets, switches, windows and door swings.
1. Record the finished wardrobe width, height and depth, plus the desk height and depth. Confirm that a 600 mm desk leaves 750–900 mm behind the chair and keeps the monitor roughly 500–1,000 mm from your eyes, with its top at or below eye level.
2. Specify the construction: fixed, fold-down or pull-out surface; hinge and bracket locations; shelf sizes; door opening direction; and the maximum load for the desktop, monitor, books and leaning. A fold-down desk still needs structural support.
3. Require wall anchoring into masonry, a structural stud or a properly designed load-bearing panel. A tall cabinet joined to a desk can still tip, and fixing only into plasterboard or a thin cabinet back is unsafe.
4. Name the panel standard, finish and edge treatment. For low-formaldehyde furniture, request documented compliance with TSCA Title VI or CARB Phase 2 where applicable, not merely a “low-VOC” claim.
5. Draw a cable route from the desktop to the power point, keeping knees clear and preventing pinching. Keep power strips and chargers accessible for inspection or replacement.
Give Nilkanth Modular Kitchen Interior - 9766310041 this complete brief, as you would any modular furniture manufacturer Pune homeowners consider, and request a dimensioned shop drawing before production.
Related products
 | Wardrobe 7x9 View product → |
 | Furniture We’re starting with the absolute basic– a comfortable bed that fits in the existing space. View product → |
Frequently asked questions
How much room depth does a wardrobe-study unit need?
A 600 mm-deep desk needs about 1.35–1.50 m of occupied depth, including 750–900 mm for chair clearance. Add a 750 mm walking passage behind the chair where people must pass.
Which wardrobe-and-desk layouts suit compact bedrooms?
Compare straight-line, L-shaped, corner, fold-down and recessed desk configurations against your wall length, door swing, window position and required clearances.
How do you keep an integrated study desk comfortable?
Provide enough knee room, place the work surface at a comfortable desk height, protect the chair zone from door swings and check that open wardrobe shutters do not block the user.
What should a buildable wardrobe-study specification include?
Record wall dimensions, floor and ceiling irregularities, wardrobe depth, desk dimensions, chair and passage clearances, storage allocation, socket positions, cable routes and door hardware.